My SQL download
1. 아래 사이트로 들어가서, MySQL Community Server를 다운로드 받는다!
나는 인텔 cpu 여서, macOS 12 (x86, 64-bit) 를 다운 받았다.
https://dev.mysql.com/downloads/mysql/
MySQL :: Download MySQL Community Server
Select Operating System: Select Operating System… Microsoft Windows Ubuntu Linux Debian Linux SUSE Linux Enterprise Server Red Hat Enterprise Linux / Oracle Linux Fedora Linux - Generic Oracle Solaris macOS Source Code Select OS Version: All Windows (x86
dev.mysql.com
2. 다운 받은 파일 클릭해서 설치 !
(계속 허용, 동의 눌러가면서 설치 ! + pwd 설정)
3. 설치 확인
cd /usr/local/mysql/bin
./mysql -u root -p

# 앞서 설정한 pwd 입력
아래와 같이 뜨면 설치 성공이다!

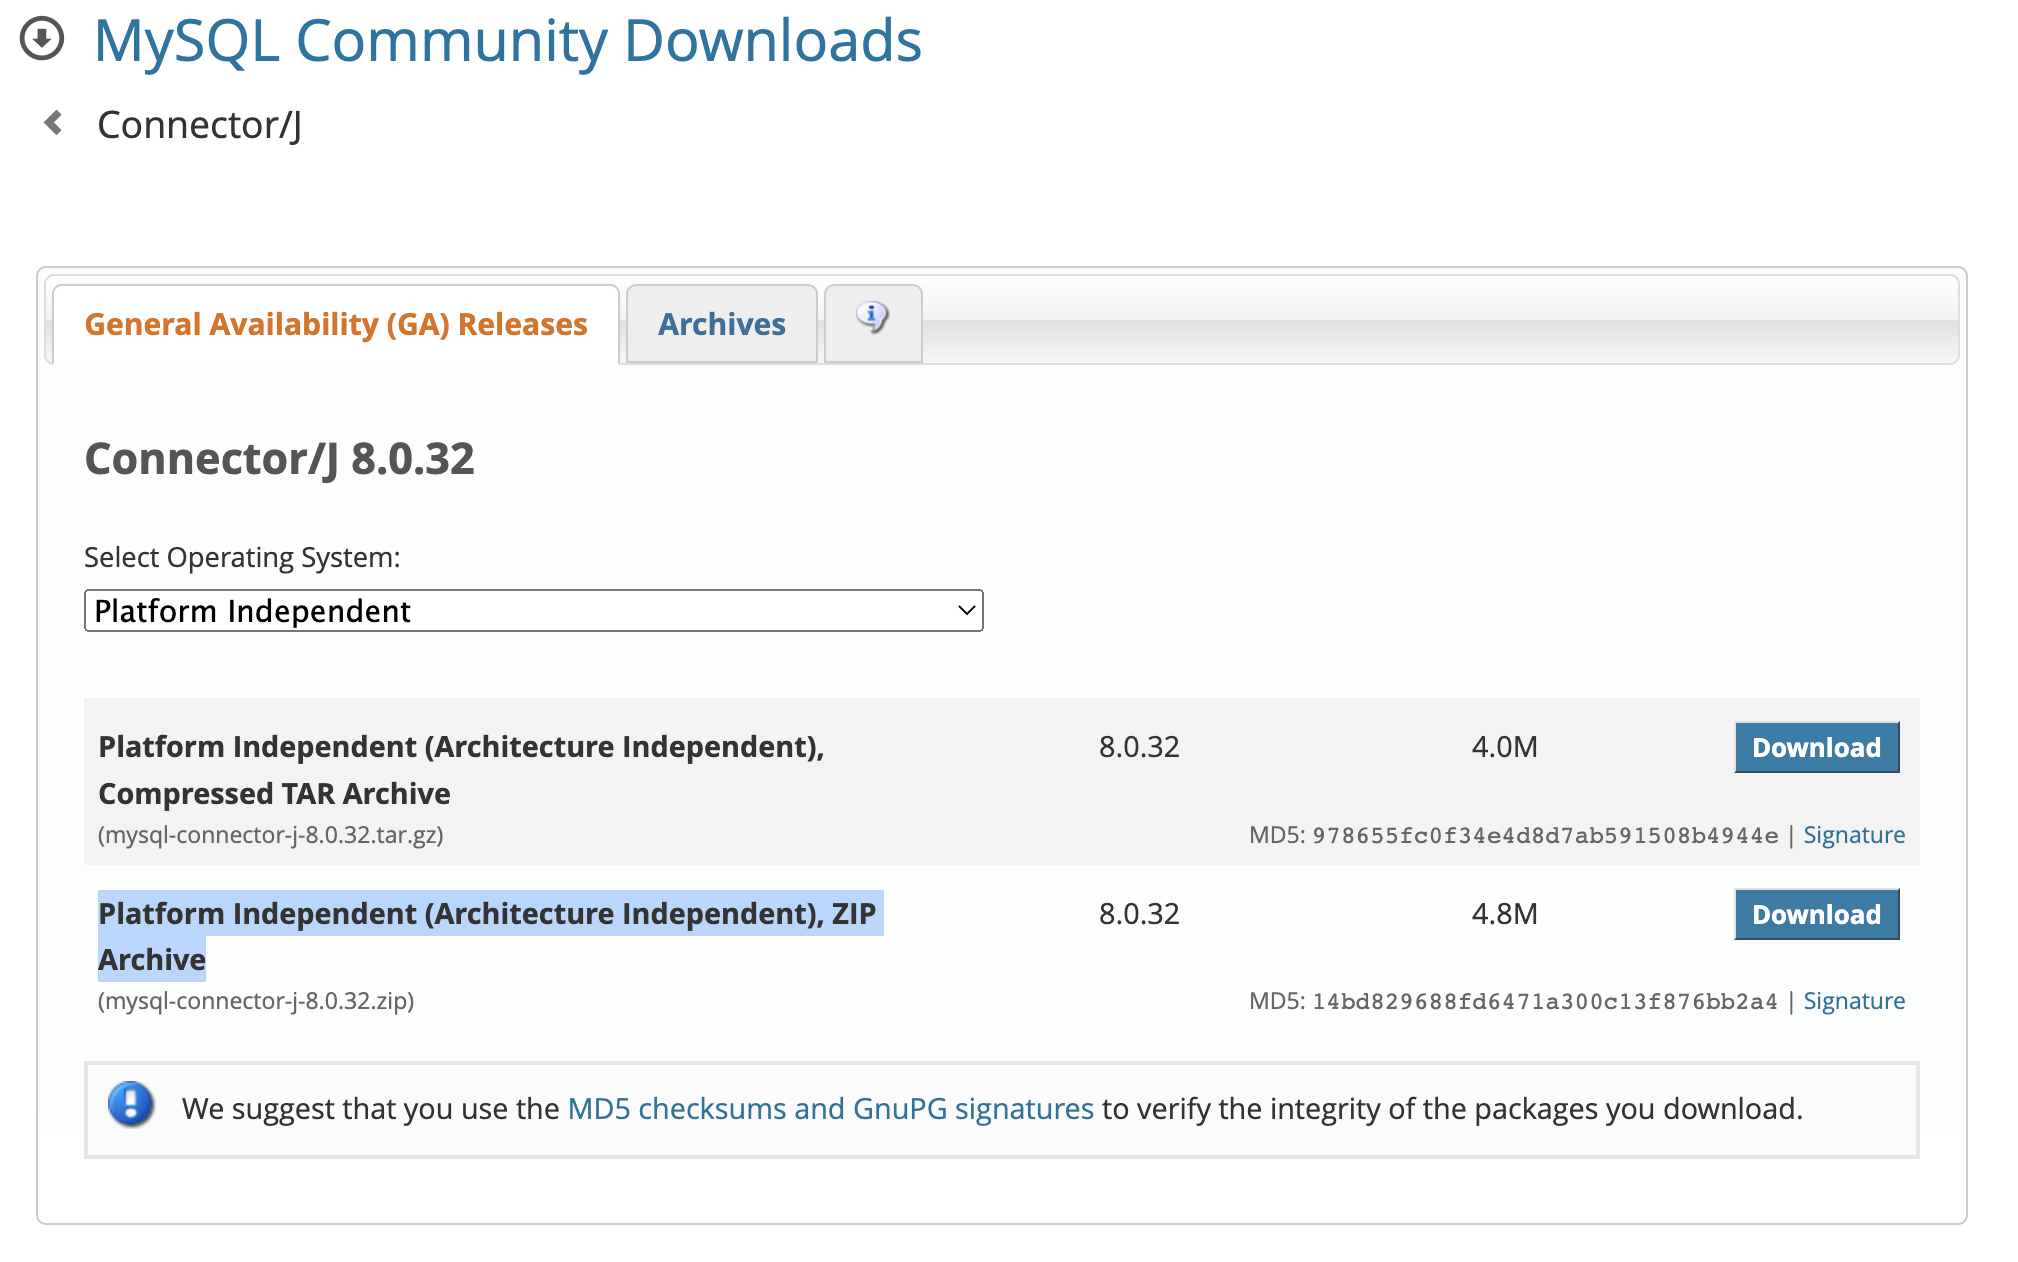
++ Connector/J zip 파일 다운로드
이클립스에서 mysql을 연결해서 사용하기 위해서 !
위 링크로 들어가서 Platform Independent를 선택해서 zip 파일을 다운 받고, 압축을 푼 후,
`mysql-connector-j-8.0.32.jar` 파일을 `apache-tomcat-9.0.71` lib 안에 넣어 주었다.
https://dev.mysql.com/downloads/connector/j/
MySQL :: Download Connector/J
MySQL Connector/J 8.0 is highly recommended for use with MySQL Server 8.0, 5.7 and 5.6. Please upgrade to MySQL Connector/J 8.0.
dev.mysql.com
MySQL Workbench download
SQL 개발과 관리, 데이터베이스 설계, 생성
그리고 유지를 위한 단일 개발 통합 환경을 제공하는 비주얼 데이터베이스 설계 도구
( * 터미널에서 'mysql -u root -p'를 입력해서 작업하는 것보다 매우 편리 ! )
1. 아래 사이트로 들어가서 MySQL Workbench를 다운로드 받는다!
https://downloads.mysql.com/archives/workbench/
MySQL :: Download MySQL Workbench (Archived Versions)
Please note that these are old versions. New releases will have recent bug fixes and features! To download the latest release of MySQL Workbench, please visit MySQL Downloads. MySQL open source software is provided under the GPL License.
downloads.mysql.com
https://dev.mysql.com/downloads/workbench/
MySQL :: Download MySQL Workbench
Select Operating System: Select Operating System… Microsoft Windows Ubuntu Linux Red Hat Enterprise Linux / Oracle Linux Fedora macOS Source Code Select OS Version: All Windows (x86, 64-bit) Recommended Download: Other Downloads: Windows (x86, 64-bit), M
dev.mysql.com
2. local instance 3306 우클릭, Edit Connection을 클릭한다.

3. store in keychain을 누르고, 비밀번호를 작성한 후, test connection을 누른다.

4. 이제 local instance 3306을 누르고 들어가서 작업을 하면 된다!

'프로그래밍 > 개발 환경 구축' 카테고리의 다른 글
| [Jenkins] Mac 젠킨스 설치 방법 (0) | 2024.03.03 |
|---|---|
| Mac 이클립스 자동완성 설정 (0) | 2023.03.21 |
| java lombok 라이브러리 (0) | 2023.03.21 |
| Apache Tomcat 설치 (0) | 2023.01.15 |
| mac JAVA Zulu Open JDK 설치 (0) | 2023.01.14 |